
Categories:
Ingredients
Soft Sugar Cookies
24 hard candies
- 3/4 cup or 1 1/2 sticks unsalted butter, room temperature
- 1/2 cup or 4 oz. full fat cream cheese, room temperature
- 1 1/2 cups Domino® Granulated Sugar
- 1 large egg, room temperature
- 2 tsp vanilla extract
- 3 cups all-purpose flour
- 1 Tbsp cornstarch
- 1/2 tsp baking powder
- 1/2 tsp fine salt
Buttercream Frosting
1 cup unsalted butter, room temperature
- 1 Tbsp vanilla extract
- 1/2 tsp fine salt
- 3 1/2 cups Domino® Powdered Sugar
- ¼ cup heavy cream
Rate Recipe


Instructions
Bake Mode
Prevent your screen from going dark as you follow along.
Prep Time: 20 minutes / Cook Time: 11 minutes / Yields: 24 cookies
Soft Sugar Cookies
Step 1
Unwrap and sort the hard candies by color then place each color in its own small resealable bags. Crush into small bits using a rolling pin, then set aside.
Step 2
Mix together 3/4 cup butter and 1/2 cup cream cheese at medium speed with a whisk attachment or hand mixer until smooth.
Step 3
Next, mix in 1 1/2 cups Domino® Granulated Sugar at a medium-high speed for a couple minutes, until the mixture becomes lighter in color. Add in 1 egg and 2 tsp vanilla extract. Mix on a low speed until incorporated.
Step 4
In a separate bowl, sift together 3 cups flour, 1 Tbsp cornstarch, 1/2 tsp baking powder and 1/2 tsp salt.
Step 5
Gradually mix the flour mixture into the butter mixture on a low speed, until it is JUST incorporated. I like to do this in a couple of installments and scrape the sides of the bowl between additions.
Step 6
At this point, the dough will still be pretty sticky. Divide the dough in half and wrap each piece of dough in a piece of plastic wrap.
Step 7
Chill in the fridge for about 2 hours or the freezer for 30 minutes. You can also chill the dough overnight.
Step 8
Preheat the oven to 350 F / 175 C for about 30 minutes before you plan to roll out the dough.
Step 9
Generously dust the surface you plan to roll the cookies out on with additional flour. Take one ball of dough out of the fridge or freezer, leaving the other to continue to chill.
Step 10
Sprinkle some more flour on top of your dough ball and on your rolling pin.
Step 11
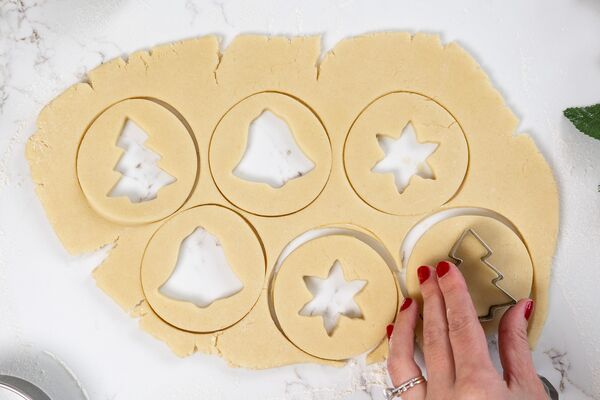
Roll the chilled dough to be 1/3 inch thick and cut out your shapes with a flour-dusted round cookie cutter. I used a 3-inch wide cookie cutter. Use a smaller Christmas-shaped cookie cutter (Christmas tree, snowflake, etc.) to cut out the center of each cookie.
Step 12
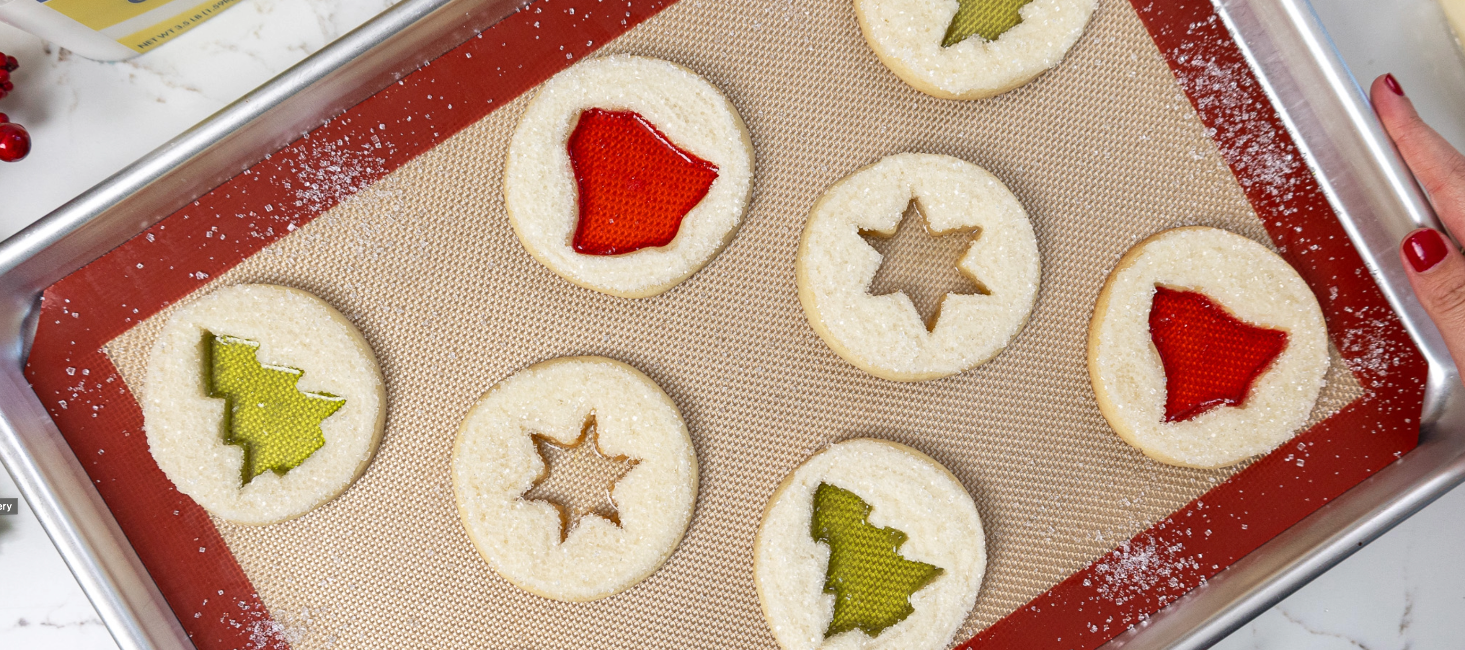
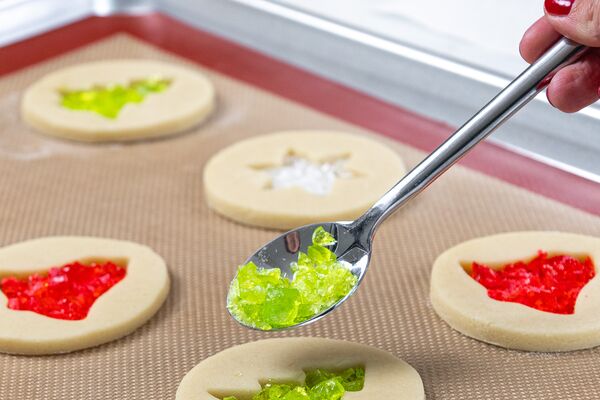
Use a kitchen brush to gently brush off any excess flour and place them on a parchment-lined baking sheet or silicone mat. Fill cut-out centers about 3/4 of the way with crushed hard candies.
Step 13
Chill the cutout cookies one more time in the fridge for 15 minutes or the freezer for 10 minutes to help them keep their shape better.
Step 14
Bake for 10-13 minutes on the top rack of your oven (time varies based on the size and shape of the cookies). Keep a close eye on these and be sure to pull them out once the candy has melted and the edges are set. Let the baked cookies cool fully on the pan.
Step 15
While the first batch bakes and cools, knead together the cookie dough scraps, and rewrap them in plastic wrap. Pop them back in the fridge to chill.
Step 16
Pull out your 2nd chilled ball of dough, and repeat steps 9-15. Then repeat with the chilled dough scraps.
Buttercream Frosting
Step 1
Beat 1 cup of butter on a medium speed for 30 seconds with a paddle attachment, until smooth.
Step 2
Mix in 1 Tbsp vanilla extract and 1/2 tsp salt on a low speed
Step 3
Slowly mix in 3 1/2 Domino® Powdered Sugar and 1/4 cup of heavy cream or milk. Beat on low until the ingredients are fully incorporated and the desired consistency is reached.
Step 4
If the frosting seems too thick, add in additional cream (1 Tbsp at a time). If the frosting is too thin, add in more powdered sugar (a quarter of a cup at a time).
Step 5
Place the white buttercream in a large piping bag fitted with a medium round tip (like a Wilton 5).
Decorating these Christmas Cookies
Step 1
Once the cookies have fully cooled, pipe white buttercream onto the cookie around the stained glass candy center. Dunk the cookie in white sanding sugar, gently pressing it into the sugar to help flatten out the frosting, and fully cover it in sanding sugar.
Step 2
Repeat with the remaining cookies, then enjoy! Frosted cookies can be stored in an airtight container for up to a day at room temperature or up to 5 days in the fridge.
Additional Tips
Making These Stained Glass Cookies in Advance and Storage Tips
You can store frosted cookies in an airtight container for up to a day at room temperature or for up to 5 days in the fridge.
If you want to stack the cookies on top of one another, I recommend adding a layer of parchment paper between them.
This cookie dough can be frozen for up to a month if wrapped tightly in plastic wrap and stored in an airtight container. I like to move the cookie dough to the fridge the night before I plan to roll it out and bake the cookies.
Baked, unfrosted cookies can also be frozen! These cookies last for up to a month if frozen in an airtight container. I recommend waiting to frost them until they’ve thawed to room temperature.
Move them to the fridge the day before you plan to eat them, then let them sit out at room temperature for a few hours before frosting them.
Tips for Making the Best Stained Glass Cookies
Liberally flour your counter before you roll out your cookie dough and move it around while you roll and cut your cookies.
Flour your cookie cutters before each cut! It helps the dough easily pop out of the cutter and helps the cookies keep their shape.
Really cream together the butter, cream cheese, and granulated sugar in the first step of this recipe. It helps incorporate air into the dough which makes fluffy and soft cookies.
Don’t over-mix your cookie dough once you add in the flour! It can over-work the gluten and result in tough and dense cookies
Roll your cookie dough out to a consistent thickness of 1/3 inch. If some are thicker or thinner than others, they may over or under-bake in the oven.
Chill your cookie dough. It helps prevent your cookies from spreading while they bake and helps them bake up soft and chewy.
Don’t overbake these cookies. Err of the side of under-baking your cookies and remember that the cookies continue to bake for a few minutes once they’re out of the oven.
Rate Recipe

Meet the Chef:
Chelsey White
@chelsweets
Meet Chelsey - a self-taught baker who left corporate America to pursue her love of cake decorating and content creation! She loves testing out new recipes and techniques, and share everything she learns along the way. Explore her recipes and tutorials that are aspirational yet achievable!
Deliciousness Delivered to You
Join our E-newsletter community and you’ll be among the first to receive the latest special offers, recipes, tips and more. Join us!